

Artificial Intelligence (AI), in particular, the advent of OpenAI’s ChatGPT, has revolutionized how we interact with technology. Chatbots powered by this advanced language model can engage users in intricate, natural language conversations, marking a significant shift in AI capabilities. However, one thing that ChatGPT isn’t designed for is integrating personalized or proprietary knowledge – it’s built to draw upon general knowledge, not specifics about you or your organization. That’s where the concept of Retrieval Augmented Generation (RAG) comes into play. This article explores the exciting prospect of building your own ChatGPT that lets users ask questions on a custom knowledge base.
In this tutorial, we’ll unveil the mystery behind enterprise ChatGPT, guiding you through the process of creating your very own custom ChatGPT – an AI-powered chatbot based on OpenAI’s powerful Generative Pretrained Transformers (GPT) technology. We’ll use Python and delve into the world of vector databases, specifically, Mongo API for Azure Cosmos DB, to show you how you can make a large knowledgebase available to ChatGPT that can go way beyond the typical token limitation of GPT models.
For experts, AI fans, or tech newbies, this guide simplifies building your ChatGPT. With clear instructions, useful examples, and tips, we aim to make it informative and empowering.
We’ll explore AI, showing you how to customize your chatbot. We’ll simplify complex concepts and show you how to start your AI adventure from home or office. Ready to start this exciting journey? Keep reading!
Also:
- How to Build a Twitter News Bot with OpenAI ChatGPT and NewsAPI in Python
- From Pirates to Nobleman: Simulating Conversations between Various Characters using OpenAI’s ChatGPT and Python
Note on the use of Vector DBs and Costs.
Please note that this tutorial describes a business use case that utilizes a Cosmos DB for Mongo DB vCore hosted on the Azure cloud.
Alternatively, you can set up an open-source vector database on your local machine, such as Milvus. Be aware that certain code adjustments will be necessary to proceed with the open-source alternative.
Why Custom ChatGPT is so Powerful and Versatile
I believe we have all tested ChatGPT, and probably like me, you have been impressed by its remarkable capabilities. However, ChatGPT has a significant limitation: it can only answer questions and perform tasks based on the public knowledge base it was trained on.
Imagine having a chatbot based on ChatGPT that communicates effectively and truly understands the nuances of your business, sector, or even a particular topic of interest. That’s the power of a custom ChatGPT. A tailor-made chatbot allows for specialized conversations, providing the needed information and drawing from a unique database you’ve developed.
This becomes particularly beneficial in industries with specific terminologies or when you have a large database of knowledge that you want to make easily accessible and interactive. A custom ChatGPT, with its personalized and relevant responses, ensures a better user experience, effectively saving time and increasing productivity.
Let’s delve into how to build such a solution. Spoiler it does not work by putting all the content into the prompt. But there is a great alternative.
Understanding the Building Blocks of Custom ChatGPT with Retrieval Augmented Generation
The foundational technology behind ChatGPT is OpenAI’s Generative Pre-trained Transformer models (GPT). These models understand language by predicting the next word in a sentence and are trained on a diverse range of internet text. However, the GPT models, such as the GPT-3.5, have a limitation of processing 4096 tokens at a time. A token in this context is a chunk of text which can be as small as one character or as long as one word. For example, the phrase “ChatGPT is great” is four tokens long.
Another challenge with Foundation Models such as ChatGPT is that they are trained on large-scale datasets that were available at the time of their training. This means they are not aware of any data created after their training period. Also, because they’re trained on broad, general-domain datasets, they may be less effective for tasks requiring domain-specific knowledge.
How Retrieval Augmented Generation (RAG) Helps
Retrieval-Augmented Generation (RAG) is a method that combines the strength of transformer models with external knowledge to augment their understanding and applicability. Here’s a brief explanation:
To address this, RAG retrieves relevant information from an external data source and uses this information to augment the input to the foundation model. This can make the model’s responses more informed and relevant.
Data Sources
The external data can come from various sources like databases, document repositories, or APIs. To make this data compatible with the RAG approach, both the data and user queries are converted into numerical representations (embeddings) using language models.
Data Preparation as Embeddings
The embeddings, which are essentially vectors, need to be stored in a database that’s efficient at storing and searching through these high-dimensional data. This is where Azure’s Cosmos Mongo DB comes into play. It’s a vector search database specifically designed for this task.
To circumvent the token limitation and make your extensive data available to ChatGPT, we turn the data into embeddings. These are mathematical representations of your data, converting words, sentences, or documents into vectors. The advantage of using embeddings is that they capture the semantic meaning of the text, going beyond keywords to understand the context. In essence, similar information will have similar vectors, allowing us to cluster related information together and separate them from a semantically different text.
Storing the Data in Vector Databases
The embeddings, which are essentially vectors, need to be stored in a database that’s efficient at storing and searching through these high-dimensional data. This is where Azure’s Cosmos Mongo DB comes into play. It’s a vector search database specifically designed for this task.
Matching Queries to Knowledge
The RAG model compares the embeddings of user queries with those in the knowledge base to identify relevant information. The user’s original query is then augmented with context from similar documents in the knowledge base.
Input to the Foundation Model
This augmented input is sent to the foundation model, enhancing its understanding and response quality.
Updates
Importantly, the knowledge base and associated embeddings can be updated asynchronously, ensuring that the model remains up-to-date even as new information is added to the data sources.
In sum, RAG extends the utility of foundation models by incorporating external, up-to-date, domain-specific knowledge into their understanding and output.
By incorporating these components, you’ll be creating a robust custom ChatGPT that not only understands the user’s queries but also has access to your own information, giving it the ability to respond with precision and relevance.
Ready to dive into the technicalities? Stay tuned!

Building the Custom “Chat with Your Data” App in Python
Now that we’ve discussed the theory behind building a custom ChatGPT and seen some exciting real-world applications, it’s time to put our knowledge into action! In this practical segment of our guide, we’re going to demonstrate how you can build a custom ChatGPT solution using Python.
Our project will involve storing a sample PDF document in Cosmos Mongo DB and developing a chatbot capable of answering questions based on the content of this document. This practical exercise will guide you through the entire process, including turning your PDF content into embeddings, storing these embeddings in the Cosmos Mongo DB, and finally integrating it all with ChatGPT to build an interactive chatbot.
If you’re new to Python, don’t worry, we’ll be breaking down the code and explaining each step in a straightforward manner. Let’s roll up our sleeves, fire up our Python environments, and get coding! Stay tuned as we embark on this exciting hands-on journey into the world of custom chatbots.
The code is available on the GitHub repository.
How to Set Up Vector Search in Cosmos DB
First, you must understand that you will need a database to store the embeddings. It does not necessarily have to be a vector database. Still, this type of database will make your solution more performant and robust, particularly when you want to store large amounts of data.
Azure Cosmos DB for MongoDB vCore is the first MongoDB-compatible offering to feature Vector Search. With this feature, you can store, index, and query high-dimensional vector data directly in Azure Cosmos DB for MongoDB vCore, eliminating the need for data transfer to alternative platforms for vector similarity search capabilities. Here are the steps to set it up:
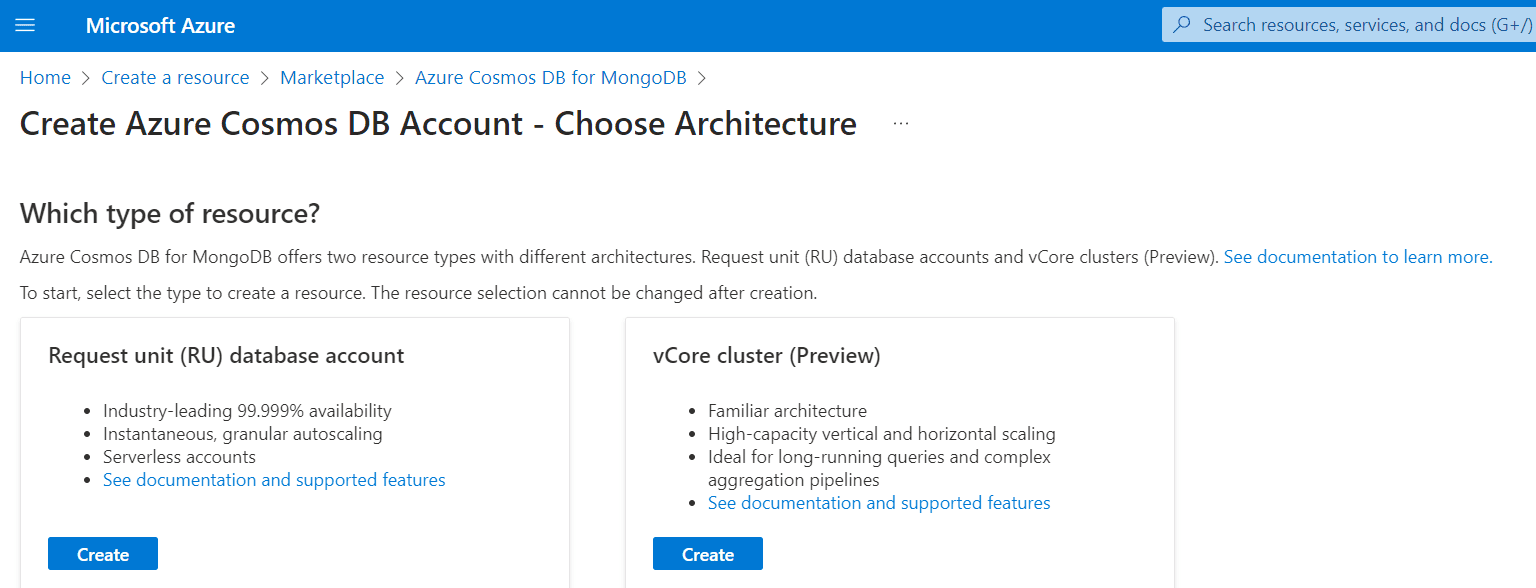
- Choose Your Azure Cosmos DB Architecture: Azure Cosmos DB for MongoDB provides two types of architectures, RU-based and vCore-based. Each has its strengths and is best suited for certain types of applications. Choose the one that best fits your needs. If you’re looking to lift and shift existing MongoDB apps and run them as-is on a fully supported managed service, the vCore-based option could be the perfect fit.
- Configure Your Vector Search: Once your database architecture is set up, you can integrate your AI-based applications, including those using OpenAI embeddings, with your data already stored in Cosmos DB.
- Build and Deploy Your AI Application: With the Vector Search set up, you can now build your AI application that takes advantage of this feature. You can create a Go app using Azure Cosmos DB for MongoDB or deploy Azure Cosmos DB for MongoDB vCore using a Bicep template as suggested next steps.
Azure Cosmos DB for MongoDB vCore’s Vector Search feature is a game-changer for AI application development. It enables you to unlock new insights from your data, leading to more accurate and powerful applications.
Cosmos DB for Mongo DB Usage Models
Regarding Cosmos DB for Mongo DB, there are two options to choose from: Request Unit (RU) Database Account and vCore Cluster. Each option follows a different pricing model to suit diverse needs.
The Request Unit (RU) Database Account operates on a pay-per-use basis. With this model, you are billed based on the number of requests and the level of provisioned throughput consumed by your workload.
As of 27th Mai 2023, the brand new vector search function is only available for the vCore Cluster option, which is why we will use this setup for this tutorial. The vCore Cluster offers a reserved managed instance. Under this option, you are charged a fixed amount on a monthly basis, providing more predictable costs for your usage.
Once you have created your vCore instance, you must collect your connection string and make it available to your Python script. You can do this either by storing it in Azure Key Vault (which I would recommend) or by storing it locally on your computer or in the code (which I would not recommend for obvious security reasons).

Using other Vector Databases
While Cosmos DB is a popular choice for vector databases, I would like to note that other options are available in the market. You can still benefit from this tutorial if you decide to utilize a different vector database, such as Pinncecone or Chroma. However, it is necessary to make code adjustments tailored to the APIs and functionalities of the specific vector database you choose.
Specifically, you will need to modify the “insert embedding functions” and “similarity search functions” to align with the requirements and capabilities of your chosen vector database. These functions typically have variations that are specific to each vector database.
By customizing the code according to your selected vector database’s API, you can successfully adapt the tutorial to suit your specific database choice. This allows you to leverage the principles and concepts this tutorial covers, regardless of the vector database you opt for.
Also: Vector Databases: The Rising Star in Generative AI Infrastructure
Prerequisites
Before diving into the code, it’s essential to ensure that you have the proper setup for your Python 3 environment and have installed all the necessary packages. If you do not have a Python environment, follow the instructions in this tutorial to set up the Anaconda Python environment. This will provide you with a robust and versatile environment well-suited for machine learning and data science tasks.
In this tutorial, we will be working with several libraries:
- openai
- pymongo
- PyPDF2
- dotenv
Should you decide to use Azure Key Vault, then you also need the following Python libraries:
- azure-identity
- azure-key-vault
You can install the OpenAI Python library using console commands:
- pip install openai
- conda install openai (if you are using the Anaconda packet manager)
Step #1 Authentification and DB Setup
Let’s start with the authentification and setup of the API keys. After making necessary imports, the code gets things read to connect to essential services – OpenAI and Cosmos DB – and makes sure it can access these services properly.
- Fetching Credentials: The script starts by setting up a connection to a service called Azure Key Vault to retrieve some crucial credentials securely. These are like “passwords” that the script needs to access various resources.
- Setting Up AI Services: Then, it prepares to connect to two different AI services. One is a version that’s hosted by Azure, and the other is the standard, public version.
- Establishing Database Connection: Lastly, the script sets up a connection to a database service, specifically to a certain collection within the Cosmos DB database. The script also checks if the connection to the database was successful by sending a “ping” – if it receives a response, it knows the connection is good.
from azure.identity import AzureCliCredential
from azure.keyvault.secrets import SecretClient
import openai
import logging
import tiktoken
import pandas as pd
import pymongo
from dotenv import load_dotenv
load_dotenv()
# Set up the Azure Key Vault client and retrieve the Blob Storage account credentials
keyvault_name = ''
openaiservicename = ''
client = SecretClient(f"https://{keyvault_name}.vault.azure.net/", AzureCliCredential())
print('keyvault service ready')
# AzureOpenAI Service
def setup_azureopenai():
    openai.api_key = client.get_secret('openai-api-key').value
    openai.api_type = "azure"
    openai.api_base = f'https://{openaiservicename}.openai.azure.com'
    openai.api_version = '2023-05-15'
    print('azure openai service ready')
# public openai service
def setup_public_openai():
    openai.api_key = client.get_secret('openai-api-key-public').value
    print('public openai service ready')
DB_NAME = "hephaestus"
COLLECTION_NAME = 'isocodes'
def setup_cosmos_connection():
    COSMOS_CLUSTER_CONNECTION_STRING = client.get_secret('cosmos-cluster-string').value
    cosmosclient = pymongo.MongoClient(COSMOS_CLUSTER_CONNECTION_STRING)
    db = cosmosclient[DB_NAME]
    collection = cosmosclient[DB_NAME][COLLECTION_NAME]
    # Send a ping to confirm a successful connection
    try:
        cosmosclient.admin.command('ping')
        print("Pinged your deployment. You successfully connected to MongoDB!")
    except Exception as e:
        print(e)
    return collection, db
setup_public_openai()
collection, db = setup_cosmos_connection()
Now we have set things up to interact with our Cosmos DB Mong DB vCore instance.
Step #2 Functions for Populating the Vector DB
Next, we prepare and insert data into the database as embeddings. First, we prepare the content. The preparation process involves turning the text content into embeddings. Each embedding is a list of flats representing the meaning of a specific part of the text in a way the AI system can understand.
We create the embeddings by sending text (for example, a paragraph of a document) to an OpenAI embedding model that returns the embedding. There are two options for using OpenAI: You can use the Azure OpenAI engine and deploy your own Ada embedding model. Alternatively, you can use the public OpenAI Ada embedding model.
We’ll use the public OpenAI’s text-embedding-ada-002. Remember that the model is designed to return embeddings, not text. Model inference may incur costs based on the data processed. Refer to OpenAI or Azure OpenAI service for pricing details.
Finally, the code inserts the prepared requests (which now include both the original text and the corresponding embeddings) into the database. The function returns the unique IDs assigned to these newly inserted items in the database. In this way, the code processes and stores the necessary information in the database for later use.
# prepare content for insertion into cosmos db
def prepare_content(text_content):
  embeddings = create_embeddings_with_openai(text_content)
  request = [
    {
    "textContent": text_content,
    "vectorContent": embeddings}
  ]
  return request
# create embeddings
def create_embeddings_with_openai(input):
    #print('Generating response from OpenAI...')
    ###### uncomment for AzureOpenAI model usage and comment code below
    # embeddings = openai.Embedding.create(
    #     engine='<name of the embedding deployment >',
    #     input=input)["data"][0]["embedding"]
    ###### public openai model usage and comment code above
    embeddings = openai.Embedding.create(
        model='text-embedding-ada-002',
        input=input)["data"][0]["embedding"]

    # Number of embeddings
    # print(len(embeddings))
    return embeddings
# insert the requests
def insert_requests(text_input):
    request = prepare_content(text_input)
    return collection.insert_many(request).inserted_ids
# Creates a searchable index for the vector content
def create_index():

  # delete and recreate the index. This might only be necessary once.
  collection.drop_indexes()
  embedding_len = 1536
  print(f'creating index with embedding length: {embedding_len}')
  db.command({
    'createIndexes': COLLECTION_NAME,
    'indexes': [
      {
        'name': 'vectorSearchIndex',
        'key': {
          "vectorContent": "cosmosSearch"
        },
        'cosmosSearchOptions': {
          'kind': 'vector-ivf',
          'numLists': 100,
          'similarity': 'COS',
          'dimensions': embedding_len
        }
      }
    ]
  })
# Resets the DB and deletes all values from the collection to avoid dublicates
#collection.delete_many({})
Step #3 Document Cracing and Populating the DB
The next step is to break down the PDF document into smaller chunks of text (in this case, ‘records’) and then process these records for future use. You can repeat this process for any document that you want to make available to OpenAI.
You can use any PDF that you like as long as you it contains readable text (use OCR). For demo purposes, I will use a tax document from Zurich. Put the document in the folder data/vector_db_data/ in your root folder and provide the name to the Python script.
Want to read in many documents at once? If you want to insert many documents, read the pdf documents from the folder and use the names to populate a list. You can then surround the insert function with a for loop that iterates through the list of document names
#3.1 Document Slicing Considerations
To convert a PDF into embeddings, the first step is to divide it into smaller content slices. The slicing process plays a crucial role as it affects the information provided to the OpenAI GPT model when answering user questions. If the slices are too large, the model may encounter token limitations. Conversely, if they are too small, the model may not receive sufficient content to answer the question effectively. It is important to strike a balance between the number of slices and their length to optimize the results, considering that the search process may yield multiple outcomes.
There are several approaches to handle the slicing process. One option is to define the slices based on a specific number of sentences or paragraphs. Alternatively, you can iteratively slice the document, allowing for some overlap between the data in the vector database. This approach has the advantage of providing more precise information to answer questions, but it also increases the data volume in the vector database, which can impact speed and cost considerations.
#3.2 Running the code below to crack a document and insert embeddings into the vector DB
Running the code below will first define a function that breaks text into separate paragraphs based on line breaks. Another function slices the PDF into records. Each record contains a certain number of sentences (the maximum is defined by the ‘max_sentences’ value). We use a Python library called PyPDF2 to extract text from each page of the PDF and Python’s built-in regular expressions to split the text into sentences and paragraphs. Note that if you want to achieve better results, you could also use a professional document content extraction tool such as Azure form recognizer.
The code then opens a specific PDF file (‘zurich_tax_info_2023.pdf’) and slices it into records, each containing no more than a certain number of sentences (as defined by’max_sentences’). After that, the function inserts these records into the vector database. Finally, we print the count of documents in the database collection. This shows how many pieces of data are already stored in this specific part of the database.
# document cracking function to insert data from the excel sheet
def split_text_into_paragraphs(text):
    paragraphs = re.split(r'\n{2,}', text)
    return paragraphs
def slice_pdf_into_records(pdf_path, max_sentences):
    records = []

    with open(pdf_path, 'rb') as file:
        reader = PyPDF2.PdfReader(file)

        for page in reader.pages:
            text = page.extract_text()
            paragraphs = split_text_into_paragraphs(text)

            current_record = ''
            sentence_count = 0

            for paragraph in paragraphs:
                sentences = re.split(r'(?<=[.!?])\s+', paragraph)

                for sentence in sentences:
                    current_record += sentence

                    sentence_count += 1

                    if sentence_count >= max_sentences:
                        records.append(current_record)
                        current_record = ''
                        sentence_count = 0

                if sentence_count < max_sentences:
                    current_record += ' '  # Add space between paragraphs

            # If there is remaining text after the loop, add it as a record
            if current_record:
                records.append(current_record)

    return records
# get file from root/data folder
pdf_path = '../data/vector_db_data/zurich_tax_info_2023.pdf'
max_sentences = 20  # Adjust the slice size as per your requirement
result = slice_pdf_into_records(pdf_path, max_sentences)
# print the length of result
print(f'{len(result)} vectors created with maximum {max_sentences} sentences each.')
# Print the sliced records
for i, record in enumerate(result):
    insert_requests(record)
    if i < 5:
        print(record[0:100])
        print('-------------------')
create_index()
print(f'number of records in the vector DB: {collection.count_documents({})}')
After slicing the document and inserting the embeddings into the vector database, we can proceed with functions for similarity search and prompting.
Step #4 Functions for Similarity Search and Prompts to ChatGPT
This section of code provides a set of functions to perform a vector search in the Cosmos DB, make a request to the ChatGPT 3.5 Turbo model for generating responses, and create prompts for the OpenAI model to use in generating those responses.
#4.1 How the Search Part Works
Allow me to provide a concise explanation of how the search process operates. We have now reached the stage where a user poses a question, and we utilize the OpenAI model to supply an answer, drawing from our vector database. Here, it’s vital to understand that the model transforms the question into embeddings and subsequently scours the knowledge base for similar embeddings that align with the information requested in the user’s prompt.
The vector database yields the most suitable results and inserts them into another prompt tailored for ChatGPT. This model, distinct from the embedding model, generates text. Thus, the final interaction with the ChatGPT model incorporates both the user’s question and the results from the vector database, which are the most fitting responses to the question. This combination should ideally aid the model in providing the appropriate answer. Now, let’s turn our attention to the corresponding code.
#4.2 Setting up the Functions for Vector Search
The vector_search function takes as input a query vector (representing a user’s question in vector form) and an optional parameter to limit the number of results. It then conducts a search in the Cosmos DB, looking for entries whose vector content is most similar to the query vector.
Next, the openai_request function makes a request to OpenAI’s ChatGPT 3.5 Turbo model to generate a response. This function takes a formatted conversation history (or ‘prompt’) and sends it to the model, which then generates a response. The content of the generated response is then returned.
The create_tweet_prompt function constructs the conversation history for the OpenAI model. This function takes the user’s question and a JSON object containing results from a database search and constructs a list of system and user messages. This list will then serve as the prompt for the ChatGPT model, instructing it to generate a response that answers the user’s question about tax, with the added guideline that the response should be in the same language as the question. The constructed prompt is then returned by the function.
# Cosmos DB Vector Search API Command
def vector_search(vector_query, max_number_of_results=2):
  results = collection.aggregate([
    {
      '$search': {
        "cosmosSearch": {
          "vector": vector_query,
          "path": "vectorContent",
          "k": max_number_of_results
        },
      "returnStoredSource": True
      }
    }
  ])
  return results
# openAI request - ChatGPT 3.5 Turbo Model
def openai_request(prompt, model_engine='gpt-3.5-turbo'):
    completion = openai.ChatCompletion.create(model=model_engine, messages=prompt, temperature=0.2, max_tokens=500)
    return completion.choices[0].message.content
# define OpenAI Prompt for News Tweet
def create_prompt(user_question, result_json):
    instructions = f'You are an assistant that answers questions based on sources provided. \
    If the information is not in the provided source, you answer with "I don\'t know". '
    task = f"{user_question} Translate the response to english /n \
    source: {result_json}"

    prompt = [{"role": "system", "content": instructions },
              {"role": "user", "content": task }]
    return prompt
You can easily change the voice and tone in which the ChatGPT answers questions by including the respective instructions in the create_prompt function.
Also: ChatGPT Style Guide: Understanding Voice and Tone Prompt Options for Engaging Conversations
Step #5 Testing the Custom ChatGPT Solution
This part of the code works with the previous functions to facilitate a complete question-answering cycle with Cosmos DB and OpenAI’s ChatGPT 3.5 Turbo model.
Now comes the most exciting part. Testing the solution, you can define a question and then execute the code below to run the search process.
# define OpenAI Prompt
users_question = "When do I have to submit my tax return?"
# generate embeddings for the question
user_question_embeddings = create_embeddings_with_openai(user_question)
# search for the question in the cosmos db
search_results = vector_search(user_question_embeddings, 1)
print(search_results)
# prepare the results for the openai prompt
result_json = []
# print each document in the result
# remove all empty values from the results json
search_results = [x for x in search_results if x]
for doc in search_results:
    display(doc.get('_id'), doc.get('textContent'), doc.get('vectorContent')[0:5])
    result_json.append(doc.get('textContent'))
# create the prompt
prompt = create_prompt(user_question, result_json)
display(prompt)
# generate the response
response = openai_request(prompt)
display(f'User question: {users_question}')
display(f'OpenAI response: {response}')
‘User question: When do I have to submit my tax return?’
'OpenAI response: When do I have to submit my tax return? \n\nAll natural persons who had their residence in the canton of Zurich on December 31, 2022, or who owned properties or business premises (or business operations) in the canton of Zurich, must submit a tax return for 2022 in the calendar year 2023. Taxpayers with a residence in another canton also have to submit a tax return for 2022 in the calendar year 2023 if they ended their tax liability in the canton of Zurich by giving up a property or business premises during the calendar year 2022. If you turned 18 in the tax period 2022 (persons born in 2004), you must submit your own tax return (for the tax period 2022) for the first time in the calendar year 2023.'
As of Mai 2023, the knowledge base of ChatGPT 3.5 is limited to the timeframe before September 2021. So it’s evident that the response of our custom ChatGPT solution is based on the individual information provided in the vector database. Remember that we did not fine-tune the GPT model, so the model itself does not inherently know anything about your private data and instead uses the data that was dynamically provided to it as part of the prompt.
Real-world Applications of Chat with your data
Custom ChatGPT boosts efficiency, personalizes services, and improves experiences across industries. Here are some examples:
- Customer Support: Companies can use ChatGPT for 24/7 customer service. With data from manuals, FAQs, and support docs, it delivers fast, accurate answers, enhancing customer satisfaction and lessening staff workload.
- Healthcare: ChatGPT can respond to patient questions using medical texts and care guidelines. It offers data on symptoms, treatments, side effects, and preventive care, helping both healthcare providers and patients.
- Legal Sector: Law firms can use ChatGPT with legal texts, court decisions, and case studies for answering legal questions, offering case references, or explaining legal terms.
- Financial Services: Banks can use ChatGPT to extend their customer service and give customers advice based on their individual financial situation.
- E-Learning: Schools and e-learning platforms can use ChatGPT to tutor students. Using textbooks, notes, and research papers, it helps students understand complex topics, solve problems, or guide them through a course.
In short, any sector needing a large information database for queries or services can use custom ChatGPT. It enhances engagement and efficiency by offering personalized experiences.
Summary
In this comprehensive guide, we’ve journeyed through the fascinating process of creating a customized ChatGPT that lets users chat with your business data. We started with understanding the immense value a tailored ChatGPT brings to the table and dove into its ability to produce specialized responses sourced from a custom knowledge base. This tailored approach enhances user experiences, saves time, and bolsters productivity.
We went behind the scenes to reveal the vital elements of crafting a custom ChatGPT: OpenAI’s GPT models, data embeddings, and vector databases like Cosmos DB for Mongo DB vCore. We clarified how these components synergize to transcend the token limitations inherent to GPT models. By integrating the components in Python, we broadened ChatGPT’s ability to answer queries based on your private knowledgebase, thereby offering contextually appropriate responses.
I hope this tutorial was able to illustrate the business value of ChatGPT and its versatile utility across a variety of sectors, including customer service, healthcare, legal services, finance, e-learning, and CRM data analytics. Each instance emphasized the transformative potential of a personalized ChatGPT in delivering efficient, targeted solutions.
I hope you found this helpful article. If you have any questions or remarks, please drop them in the comment section.
Sources and Further Reading
- Azure Cosmos DB
- OpenAI pricing
- Azure OpenAI
- Semantic search
- What are embeddings?
- Using vector search on embeddings in Azure Cosmos DB for MongoDB vCore
- OpenAI ChatGPT helped to revise this article
- Images created with Midjourney

Hi Florian,
Thanks for this great tutorial.
What I couldn’t find in this article and most of the other similar tutorials is: how to keep the index updated in an efficient way for production-ready apps with a Mongo DB (Cosmos Mongo) that has regular data inputs from users through the backend and not necessarily via uploading files.
Do you have any idea how can I do that?
thanks
How we can load multiple documents and get there embeddings?
Hi Pradeep,
two options:
1) you can loop over the content and make separate API calls to generate the embeddings
2) or you pass a list to the ada embedding model and get a list of embeddings as a response. -> more information here: https://platform.openai.com/docs/api-reference/embeddings/create