

Anaconda is a popular open-source Python environment specifically designed for data science and machine learning. It comes with a range of useful features and tools, including Jupyter Notebooks, pre-installed packages, and a powerful package manager. It is the most widely used Python environment among data scientists and machine learning practitioners.
In this article, we will introduce some of the key features of Anaconda and show you how to set up the Anaconda Python environment for machine learning in Microsoft Windows. We will also cover some essential commands, such as managing virtual environments and installing packages, which will help you get started with your machine learning projects. Whether you are new to machine learning or an experienced practitioner, Anaconda is a valuable tool that can help you streamline your workflow and accelerate your progress. So, it is essential to learn how to use it effectively.
What is the Anaconda Distribution Platform?
For various reasons, Anaconda has become the most popular Python environment for machine learning. First of all, Anaconda includes a Python distribution, so there is no need for a separate Python installation. In addition, Anaconda has an integrated package manager that provides access to several tools and frameworks used in data science and software engineering, including Spyder, RStudio, Visual Studio Code, and Jupyter Notebooks. Below is a brief description of these tools:
- Jupyter Notebooks: They are open-source web applications that support creating and sharing code, equations, visualizations, and narrative text.
- Pycharm: A fully integrated python programming environment for professional purposes
- Qt Console: A light-weight terminal application for visualization
- Spyder: Apython environment specifically designed for scientific purposes
- RStudio: An environment for the programming language R
- Visual Studio (VS) Code: An IDE for professional purposes by Microsoft
- Orange: A python environment for data mining and visualization
- Glueviz: An open-source Python library for exploring data relationships
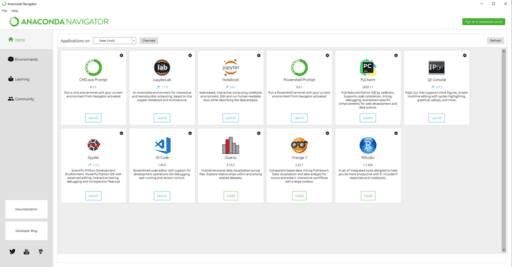
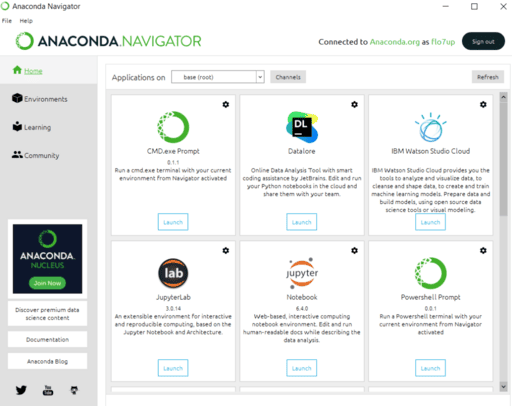
Many essential libraries related to data science are already preinstalled, including NumPy, Pandas, matplotlib, etc. Furthermore, Anaconda comes with a desktop GUI called Anaconda Navigator (see below), making it easy to launch applications and manage packages and environments without using command-line commands.
About Jupyter Notebooks
Most data scientists who use Anaconda also work with Jupyter notebooks. Jupyter notebooks are often used in the field of data science because they provide a convenient and interactive way to work with data, and they make it easy to share your work with others. They are also widely used in education, allowing you to create interactive lectures and exercises.
Jupyter notebooks are interactive documents that contain a mix of code, text, and other media, such as images, equations, and charts. They are commonly used for data exploration, visualization, and machine learning tasks. Jupyter notebooks support more than 40 programming languages, including R and Python, and can run in different environments, thus making them very flexible. Furthermore, they are web-based and easy to set up. They also make it easy to version your code and share it with others.
Jupyter notebooks are composed of cells, which can contain either code or text (using the Markdown formatting language). The code in a cell can be executed by pressing Shift+Enter, and the output of the code will be displayed below the cell. This allows you to develop and test your code iteratively, and to document your work by including explanations and visualizations alongside the code.
Anaconda includes Jupyter as part of the installation. Once you have Anaconda installed, you can launch Jupyter by running the Jupyter lab or Jupiter notebook command in the terminal. This will open the Jupyter web interface in your web browser, from which you can create and open notebooks.
Setup the Anaconda Python Environment for Machine Learning
We will set up Anaconda to work with Python and Jupyter notebooks in the following.
- Download Anaconda
- Install Anaconda
- Starting Anaconda
- Create and manage environments
- Install additional packages as needed
Each of the steps will be discussed in more detail in the following. Let’s get things started!
Step #1 Choose and Download the Right Anaconda Version
First, download the latest version of the Anaconda individual edition from the Anaconda website. The Anaconda full version comes with all packages preinstalled. If disk space is an issue, you can also use Miniconda, a complete Anaconda environment but without the preinstalled packages.
You will need to select the version of Anaconda that is appropriate for your operating system. The Anaconda download page will choose between Anaconda for Python 2.x and 3.x. Today, most machine learning libraries support Python 3. However, it wasn’t long ago when many people debated whether version 2 or 3 was the better Python version. Many people will agree that Python 3 has won this battle and is the preferred choice among the data science community.
When writing this article, the latest version of the Anaconda individual edition is 4.3.1. After the download, you can launch the Anaconda installer, which guides you through the installation process.
Step #2 Install the Anaconda Python Environment
You can choose whether to add Anaconda to your PATH environment variable during the installation. You can leave this option unchecked. Also, the installation asks you to register Anaconda as the default Python environment, which I recommend because it enables other tools to access the Anaconda Python distributions.


Step #3 Starting the Anaconda Python Environment
Once the installation process is complete, you can launch the Anaconda Navigator, which provides access to all the tools and CLIs you will be working on within your data science projects.
Anaconda comes with several Python packages preinstalled. The Anaconda website provides an overview of these packages. To display a list of the packages in your Anaconda python environment, use the CMD command:
pip list
Before starting with your machine learning projects, you should ensure that you have the essential packages installed. Anaconda installation includes many packages, but some of the commonly used packages in machine learning still require a manual installation. In the relataly articles, we will be working with the following non-preinstalled packages:
- Geopandas: GeoPandas is an open-source project to make working with geospatial data in Python easier.
- Tensorflow (Keras): Deep learning library used for neural networks.
- Seaborn: A package for creating nice visualizations with lots of customization options.
- Scikit-learn: Different tools and algorithms for predictive data analysis.
You can add these packages to your Anaconda environment by running the following conda install commands from the CMD prompt:
# Tensorflow
conda install tensorflow
# or: pip install Tensorflow

# Scikitlearn
pip install sklearn

# GeoPandas
conda install geopandas
# or:pip install geopandas

# Pandas Data_Reader
conda install pandas-datareader
# or:pip install pandas-datareader

# Keras
pip install keras
With the conda install package command, you can access a cloud-based repository to find and install over 7,500 data science and machine learning packages. To download additional packages from the conda repository, use the command: “conda install package name”
Step #4 Create a New Python Environment
A key feature of Anaconda is its support for multiple virtual isolated programming environments. Virtual environments allow you to work with specific versions of libraries or Python. ThPythonhelpful because, from my experience, putting everything into a single environment leads to compatibility issues sooner or later.
Virtual environments have their packages and paths. Therefore, you don’t have to worry about the effect of packages on other Python environments. The best way to solve compatibility issues is by creating a new environment where you install these specific libraries that you need for your current project.
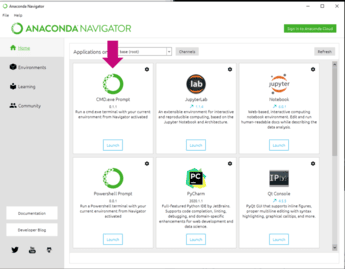
The preferred way to create and manage environments in Anaconda is by using CMD terminal commands. You can launch the CMD prompt from the Anaconda Navigator, as shown below. There is also a graphical interface for managing environments, but I find its use rather tedious.
From the Anaconda Navigator, you can create new environments and install packages. To create a new environment, click on the “Environments” tab, then click the “Create” button. Give your environment a name and select the version of Python that you want to use. You can also select any additional packages that you want to be installed in the environment.
Below is a list of essential CMD commands for creating and managing environments in Anaconda:
# Display a list of all environments
conda env list

# Create a new Environment with a specific Python version
conda create -n yourenvname python=x.x anaconda

# Create an exact copy of an existing environment
conda create --clone py35 --name py35-2

# Update Anaconda
conda update conda

# Activates the environment, so that all subsequent activities affect this environment
source activate yourenvname

# Install a new package into a specific environment
conda install -n yourenvname [package]

# Deactivate an environment
source deactivate

# Remove an environment including all packages
conda remove -n yourenvname -all
For additional commands, you can look at this Conda cheat sheet.
Step #5 Create a Jupyter Notebook
Next, we create a new Python Jupyter notebook. You can launch Jupyter Notebooks from the Anaconda Navigator. The Jupyter Python environment will launch in a new browser window. Be aware that the notebook will use the virtual Anaconda environment that is currently active. The standard virtual environment is the “base” environment.
If you want to create a new environment, you can do this by launching the command prompt and typing the following command:
conda create --name <env name> <possible packages, e.g., keras, numpy, etc.>
Once you have created a new environment, you can activate it with the following command:
conda activate <env name>
Once you have launched the Jupyter notebook environment, you should see the standard folder path. In the folder path, you can choose a workspace folder that will contain all the Python code and the resources of your python projects. I have located my workspace at C:\Users\Username\My_Jupyter_Workspace.
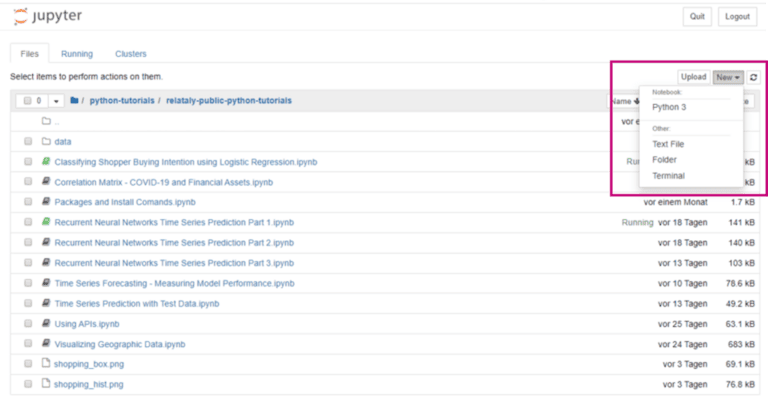
To create a new Python notebook, click the “New” tab and select Python. A Pythonndow will open, and you can start to code.
That’s it. You have brought your Python infrastructure in place and can start coding.
Summary
This article has provided a comprehensive guide on setting up the Anaconda Python Environment for machine learning projects. By following the steps outlined in this article, you have successfully installed and configured the Anaconda Python environment, which is an essential tool for any data scientist or machine learning engineer.
One of the key takeaways from this article is learning how to manage virtual environments, which is an essential practice for any data scientist or machine learning engineer. By creating separate virtual environments for different projects, you can ensure that each project has the necessary dependencies and libraries without interfering with other projects. This also helps to avoid version conflicts and ensures reproducibility.
Another important aspect covered in this article is package installation. By using Anaconda’s built-in package manager, Conda, you can easily install and manage the necessary packages and libraries for your machine learning projects. Conda also makes it easy to switch between different versions of packages and manage dependencies.

Sources and Further Reading
If you still need ideas for your first projects, the following tutorials may offer some inspiration:
- Simple Cluster Analysis using K-Means with Python
- Simple Sentiment Analysis using Naive Bayes and Logistic Regression
- Building a Movie Recommender using Collaborative Filtering in Python
- Getting Started with Image Recognition: Classifying Cats and Dogs using Neural Networks with Python
- Images created with Midjourney
- ChatGPT helped to revise certain parts of this article.

Your article helped me a lot, is there any more related content? Thanks!